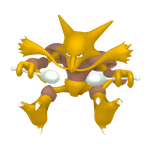
Standard
Chiêu thức
- Psychic[object Object]special
- Seismic Toss hoặc Reflect Chiêu thay thế
Tải game để mở khóa toàn bộ chiêu thức trên trang.
Nhấn nút tải xuống bên dưới để mở khóa ngay.
Phân tích
Set Description Alakazam is one of the best leads in RBY OU. Since it's the fastest lead that regularly sees use, it's almost guaranteed to be able to immediately cripple something from the start of the game, be it through paralysis or serious damage with Psychic. This means Alakazam is great for pressuring opposing leads. Against other Alakazam, one generally wants to paralyze it and try to get a physical attacker like Snorlax in on a predicted Recover. However, be careful to not leave the field too damaged, as Exeggutor can have Double-Edge or Hyper Beam to pressure Alakazam. Generally, you don't want to switch out at less than 80% in order for Alakazam to avoid the 2HKO from Exeggutor's Double-Edge most of the time. Gengar leads generally switch out against Alakazam due to the threat of a 2HKO from Psychic as well as an OHKO with a critical hit. Starmie should generally be approached the same way as an opposing Alakazam. However, one must be wary of Chansey when using Thunder Wave early on; its extreme bulk turns it into a phenomenal sleep blocker when paralyzed. As a result, it becomes very difficult to put anything to sleep until the now-paralyzed Chansey is KOed. A lead Alakazam's role, besides crippling the opposing lead, is mostly to absorb sleep. If used in this fashion, Alakazam should absolutely be running Seismic Toss. This allows Alakazam to hit Starmie and Exeggutor rather than waste Psychic's PP. Lead Alakazam can also be used to absorb paralysis from those who propagate it, such as Chansey, Starmie, and other Alakazam. This especially goes for Chansey without Seismic Toss. It's also effective against Starmie without Surf or Psychic, the latter of which can force Alakazam out after a few Special drops. Alakazam also tends to attract physical attackers like Snorlax, Tauros, and Rhydon on a forced Recover turn. If you can correctly predict the switch, you might be able to sneak in a Thunder Wave or Psychic on them. Moreover, due to Alakazam being one of the few pure special attackers that can force Chansey out, it is also an efficient paralysis spreader that can be used as such throughout the course of the battle. In some situations, you might still resort to using non-lead Alakazam as if it were in the lead slot to check or pressure opposing Pokemon such as Chansey and Starmie. It can also be used to function as a sweeper late-game. This strategy revolves around keeping Alakazam hidden, then attempting to clean up once its checks have been removed. Reflect can be used on sweeper Alakazam to give it a much-needed Defense boost, but it also means Alakazam will only have Psychic to attack with. In addition, Reflect Alakazam can still be taken care of through paralysis, critical hits from Tauros and Zapdos, and Explosion. Explosion is especially pressing if paralyzed, as even if Reflect Alakazam survives, it's still easily revenge killed by threats such as Tauros. However, Seismic Toss remains very usable in this context for beating Starmie and other Psychic-types more consistently. When using Alakazam as a sweeper, the rest of the team should work on removing Alakazam's checks before it's revealed. These checks include special sponges such as Starmie, Alakazam, and Chansey. Pokemon that resist Psychic, such as Slowbro and Exeggutor, are also important to remove. For maintaining maximum sweeping potential, Alakazam should also try to avoid paralysis as much as possible, as its Speed is the reason it's able to compete with other late-game sweepers for a team slot. Ideally, Tauros should also be put in range of Psychic to avoid its high critical hit rate and Body Slam's paralysis chance. Fortunately, that can easily be accomplished through a Tauros mirror, a common scenario in RBY OU battles, since two Body Slams will leave the opponent's Tauros in said range.